
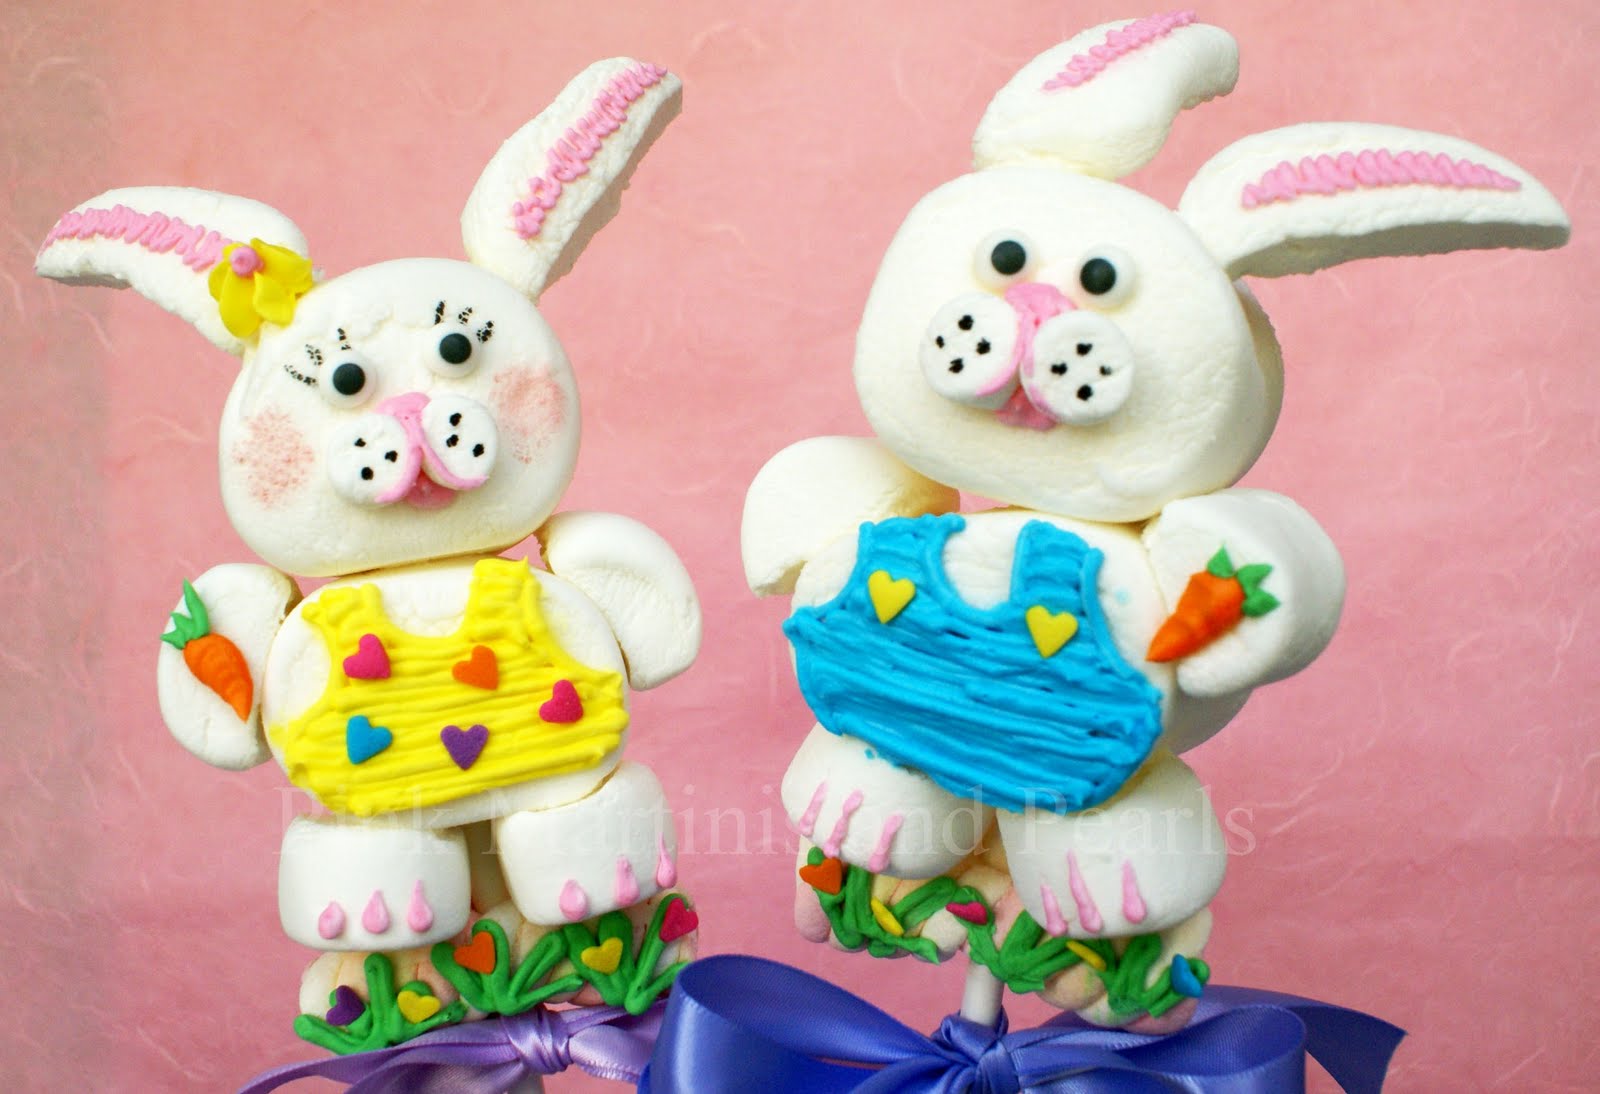
If you read my Facebook page you’d know I’ve had 2 days notice that my boys were coming home for their spring breaks! Joy and panic! With no time for a new post with photos, etc., I’m re-posting these cute bunny marshmallow pops from 2011 for one big, wonderful reason – I found all the marshmallows this week at my local chain grocery stores!! The jumbo marshmallows are in Safeway and the curly marshmallows are at Ralphs so now all the marshmallows – the regular, mini, jumbo and twisty seem to be readily available! Yay! If you still can’t find the twisty ones, don’t worry, those are optional.
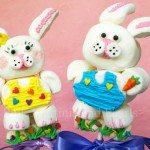
This is a fun project to make with little helpers and the bunny pops make cute favors for your guests.
Hope you enjoy this very thorough tutorial while I enjoy being a daily mom again, at least for a week! Empty nesters can’t be choosy. We are grateful for any time shared we us. 🙂

Here’s how and what you’ll need:

3 extra-large (jumbo) marshmallows
2 regular (large) sized marshmallows
1 mini marshmallow
1 twisty marshmallow
Candy Writer in white or white candy coating that you melt. This is not frosting but “chocolate” candy coating.
pan of hot water, not boiling (for the Candy Writer use only)
12″ long lollipop sticks, 1 for each bunny
pink petal dust (optional)
black food pen (optional)
heart shaped sprinkles (optional)
2 – #3 tips
1 – #2 tip
decorating bags
royal icing decorations (optional) purchase or make your own
-carrot
-drop flower
-eyes
damp cloth
scissors
cello bag
ribbon
1. Start by moistening the stick with a damp cloth. Not a lot. Just slide the cloth over the stick a couple times. This will help your marshmallows not to stick as you put them on.
2.

3.

4. Take the second extra-large marshmallow and start to thread it the same way on the stick as the first but do not go through the top. When you feel the top of the stick near the top of the marshmallow but still inside of it, stop.
5.
Here’s where the Candy Writer or melted candy coating comes in ~
Every place where marshmallows touch each other will be ‘glued’ together with the melted candy coating or Candy Writer.
When I say ‘glued’ I mean using the candy coating.
Everything is edible on this lollipop except the stick!

6.

7. Don’t mark your marshmallows.
I just did this to show you which way to cut.

8.

9. Next, slide up the twisty marshmallow and glue this in place. Hold to set.
10.

11.

Here’s what we should have so far.

The next couple of steps is where you’ll see your little guy or girl really develop some personality!
12.

Which side of the ears will be in front is according to your preference ~
the sticky side or the non-sticky side.
Some ideas for you ~
if you go with the sticky side you can press the sticky sides in pale pink sanding sugar. If you go with the non-sticky side you can draw a line or two of pink royal icing or use pink petal powder.
I show both of these.
If you want them plain you can always dust the sticky side with a small amount of corn starch and they won’t be sticky anymore.
If you’re making a bunch of these cuties, make them all different!
13.

14.

15.

16.
Now it time to decorate!

Mix up a quarter cup of yellow, pink, and green for the girl and blue, pink, and green for the boy or whatever colors you wish.
Green Grass ~
Using a #3 tip, make some green squiggles on the twist marshmallow for grass.
I added some heart-shaped sprinkles for flowers.
Yellow Dress (girl) ~
Using a #3 tip, outline a dress on the girl and fill in with lines of icing.
Adding some heart-shaped sprinkles is optional.
You could use round sprinkles like polka dots or nothing at all.
Pink Accent Areas ~
Using a #2 tip, build up the nose and add 2 sweeps across whiskers area.
Build up the mouth area. Add toes.
Pedicure dots for the girl and small lines for the boy.
You can also run a line of pink for the ears.
Blue Overalls (boy) ~
Using a #3 tip, outline overalls and fill in with lines of icing.
You could use a couple dragees or round sprinkles for buttons.
Add a bow tie if you have room.
17.
Using a black food pen, draw little dots on the whisker area.
Add eyes. Either drawn on or made from royal icing. I show both.
I gave my girl bunny eyelashes and a little flick of eyeliner.
So chic for spring time.
18.
Glue additional royal icing decorations, carrots and flowers, if you have purchased them or if you have made your own ahead of time. I actually piped mine right on the bunnies so I also made some orange icing.
Let the icing dry before packaging.
Place in a cello bag and finish with a pretty ribbon!

Happy Spring! Happy Easter!


These are so freaking cute! Can’t believe the clever ideas you come up with! xo
Hi Karen, thank you but I took a class to learn how to make them and then added my own touches. 🙂
Oh my goodness, these are sooo cute!
I’m definitely not crafty, but I think this tutorial will allow even me to make these for Easter…absolutely adorable!!
Wow those are amazing! Have a wonderful weekend!
How cleaver! I love these little guys.
Thanks for the fab tutorial too.
xo jj