Icing & Decorating.

This is the fun part!
Part IIGet your mixer bowl and whisk ready and we’re off!
Royal Icing:
1 lb. Powdered Sugar (does not need to be sifted)
3 Tbl. Meringue Powder
6 Tbl. Hot Water (from tap is fine)
Make sure your bowl and whisk attachment is grease free.
Why grease free? Grease and egg whites don’t mix and the whites will not rise. Give both a pre-wash if they’ve been sitting unused in your kitchen for awhile.
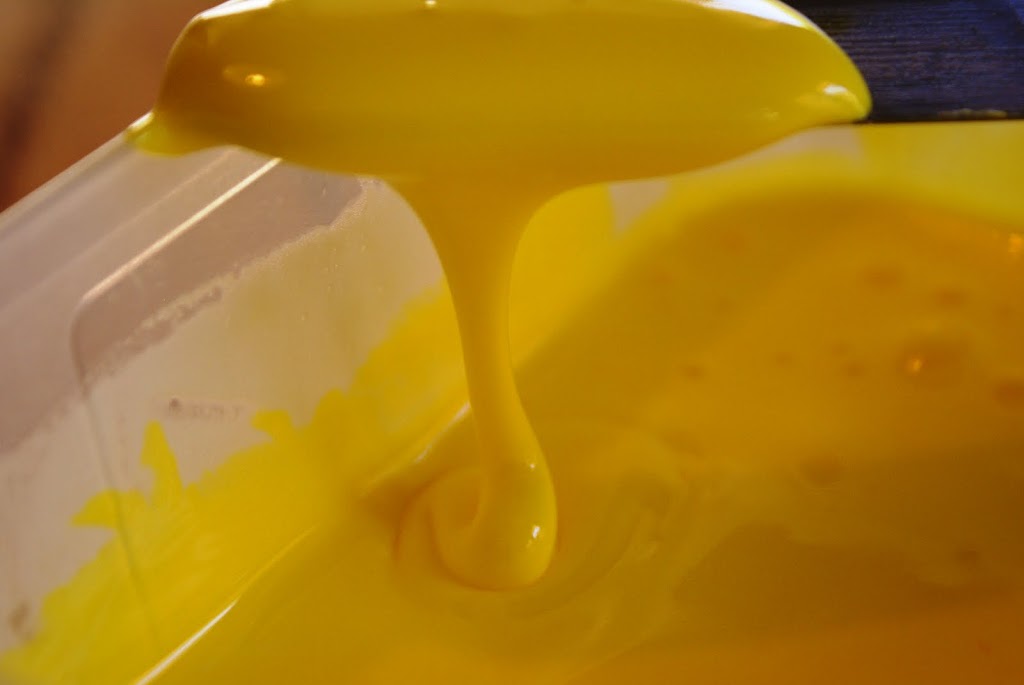
With a whisk attachment beat all the ingredients on high until fluffy.
Do not under beat. I mix for at least 8 minutes.
Put the icing immediately in a container with a tight lid to prevent it from drying out.
If I know what colors I am mixing I will divide the icing into small containers with lids or fold a wrung out paper towel to cover. The very small Glad disposables are good so you can have a lot of them ready to go and they are inexpensive. The best part is if you get tired of seeing icing and don’t feel like washing at the end of your creativity you can throw them away. I do this with disposable piping bags. Get a bunch and make your life easier.
All the icing except on the Indian corn and the green leaves and stems on the pumpkin were prepared the following way:
“Count to 10 For The Perfect Consistency“
Here’s how to get the perfect consistency –
Count To “10”.Add water a teaspoon at a time for small amounts. Mix it well into the icing. Now pull up a dollop of icing on your spoon or spatula and let it drop back down into the bowl. Count to 10. If the dollop seems to melt and disappears back into the icing by the count of 10 it will be the perfect consistency. If you can still see remnants of the dollop add a touch more water. If if melts back in too quickly then you need to add more regular icing to give it more body.
Colors:
I only use gel colors.
Powders never mix in well and pastes take time to work in. I think every company has gone over to gels now anyway. Add colors by dipping in a tooth pick into the color. Do not re-use the tooth pick. The color jars will last indefinitely if they are not contaminated with the icing. The color intensity will be higher for royal icing compared to adding color for cake icing. This is due to the absence of a grease base. I feel like Alton Brown. 🙂
* It is also easier to mix the colors if you have thinned out the icing first.
These are my favorite tools.
Craft brushes and a baby spoon.
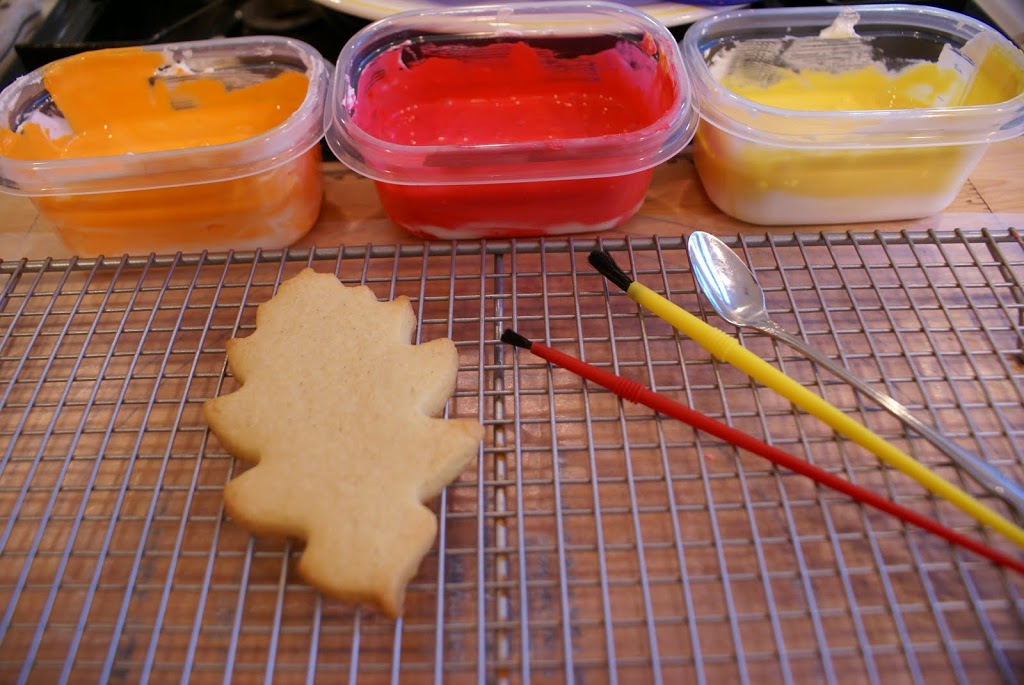
I find spreading the icing with a small spatula or knife is still too large for some of the small curves I get into and the baby spoon is just the right feel. You’ll find what feels right to you. 🙂
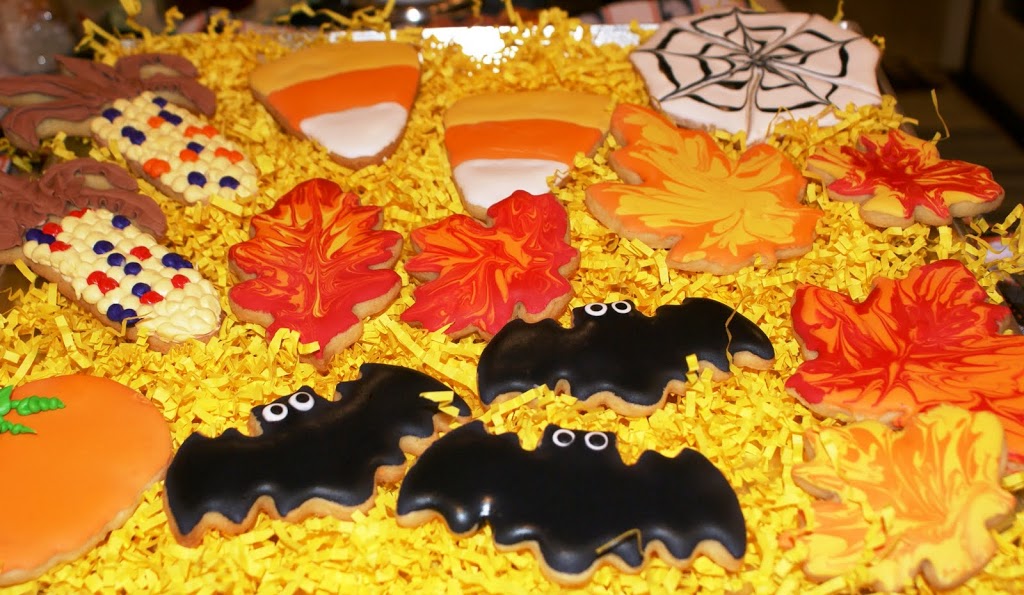
These cookies were a quickie job since we are getting ready to leave to see son2 for Parent’s Weekend or I would have embellished a few of them differently if I had the time.
Here are some ideas of what you can do and the specific decorating things I did for each of the cookie designs.
Candy Corn –
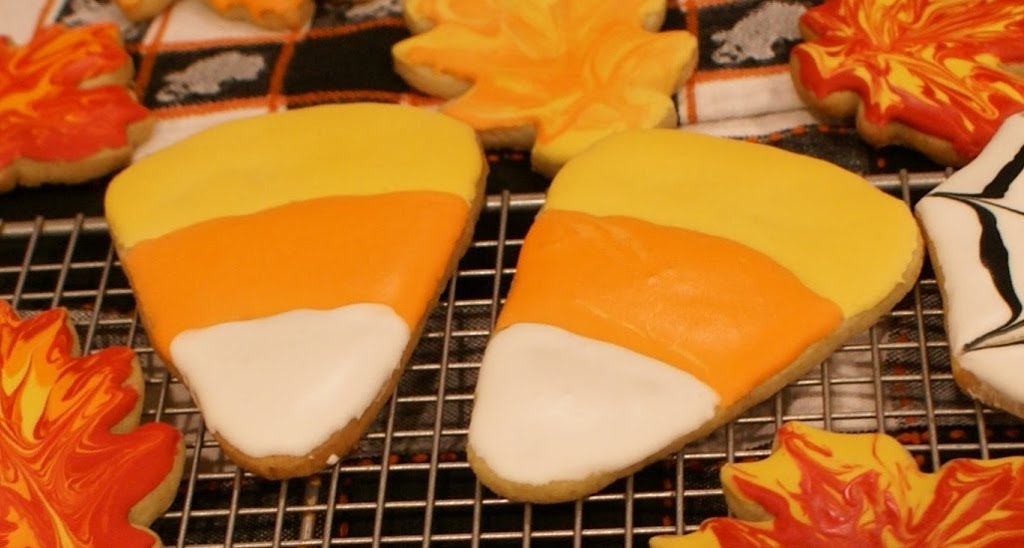
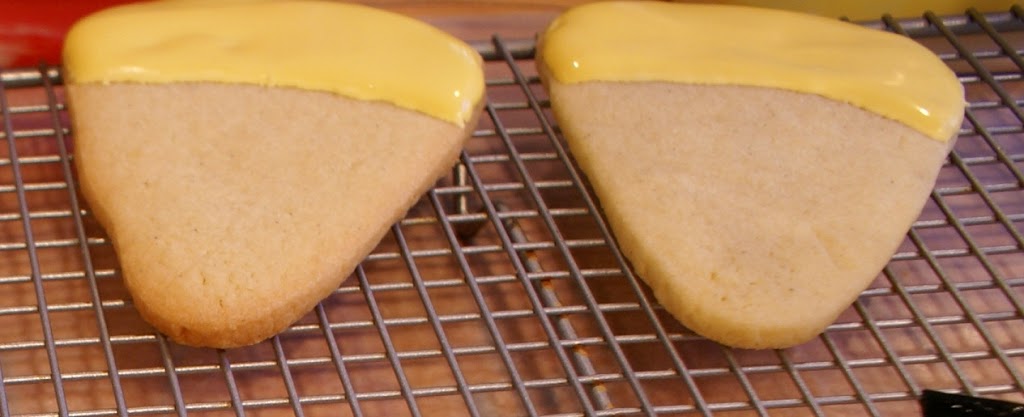
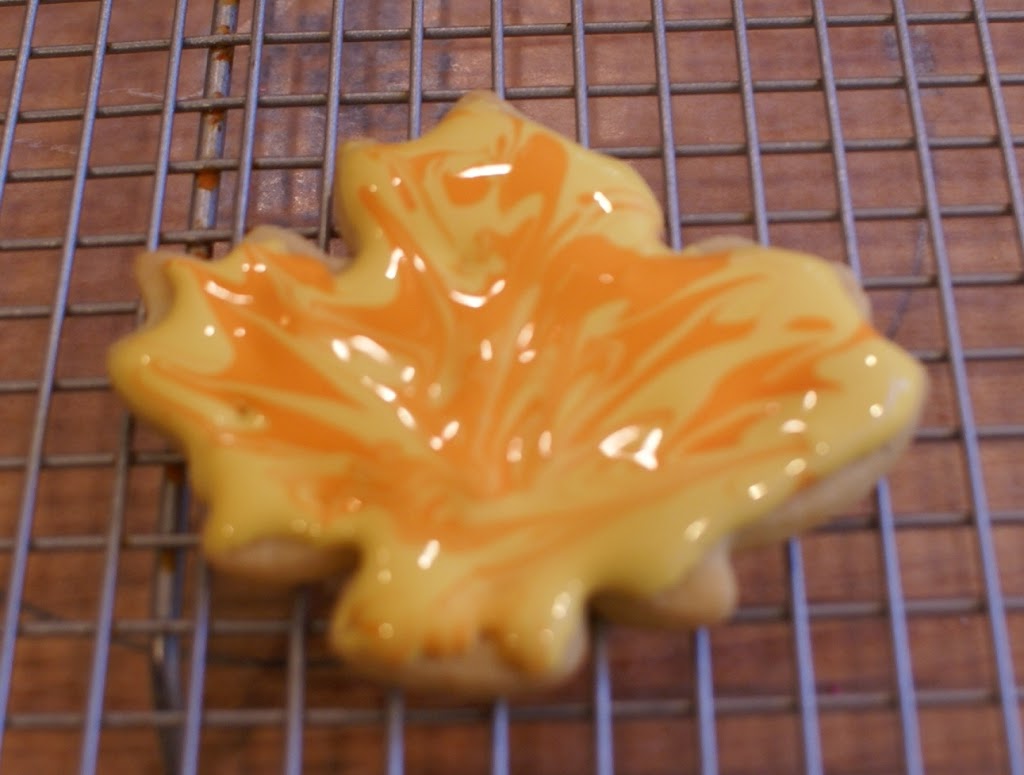
If you do all colors at once touching the border of the adjacent color, the colors will bleed. Colored sugar is fun to use for a different texture. If you are doing this do one color at a time, sprinkle with corresponding color and let dry. Turn cookie over and tap off excess sugar and go on to your next color.Fall Leaves –
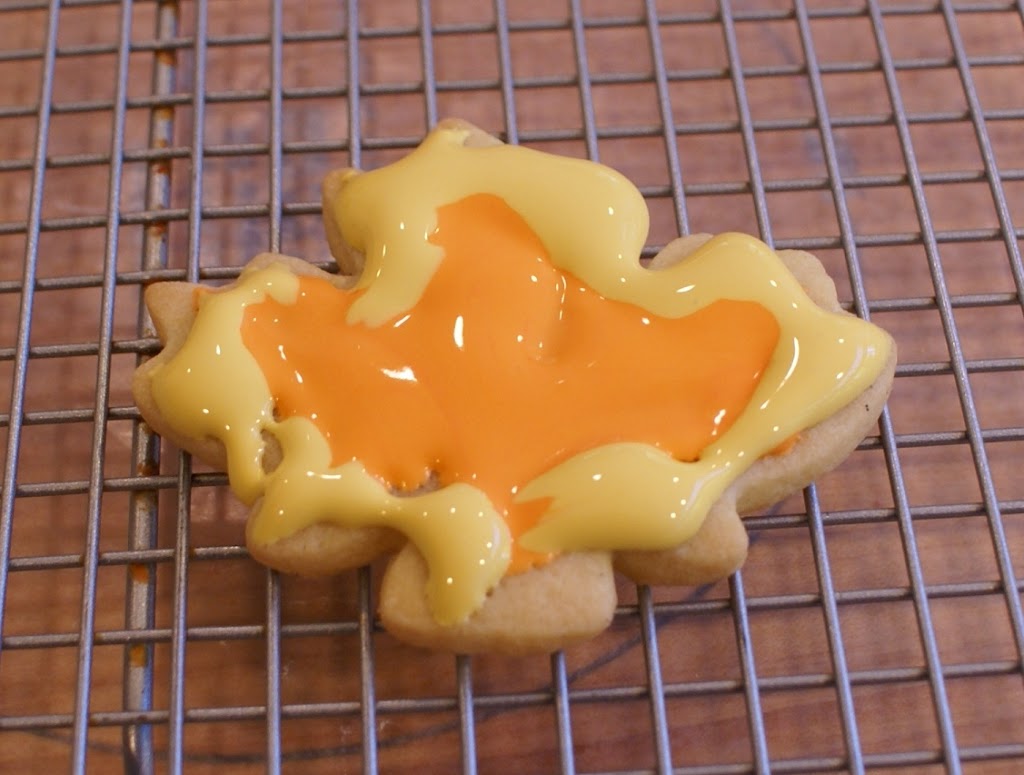
I then take the end of the craft brush and swirl it around.
My first ones are never as good as the ones I do last. The above leaf is one of my first. Because I only do this once a year I forget what I did to perfect my technique the year prior.
This is one my my last leaves. Much better.
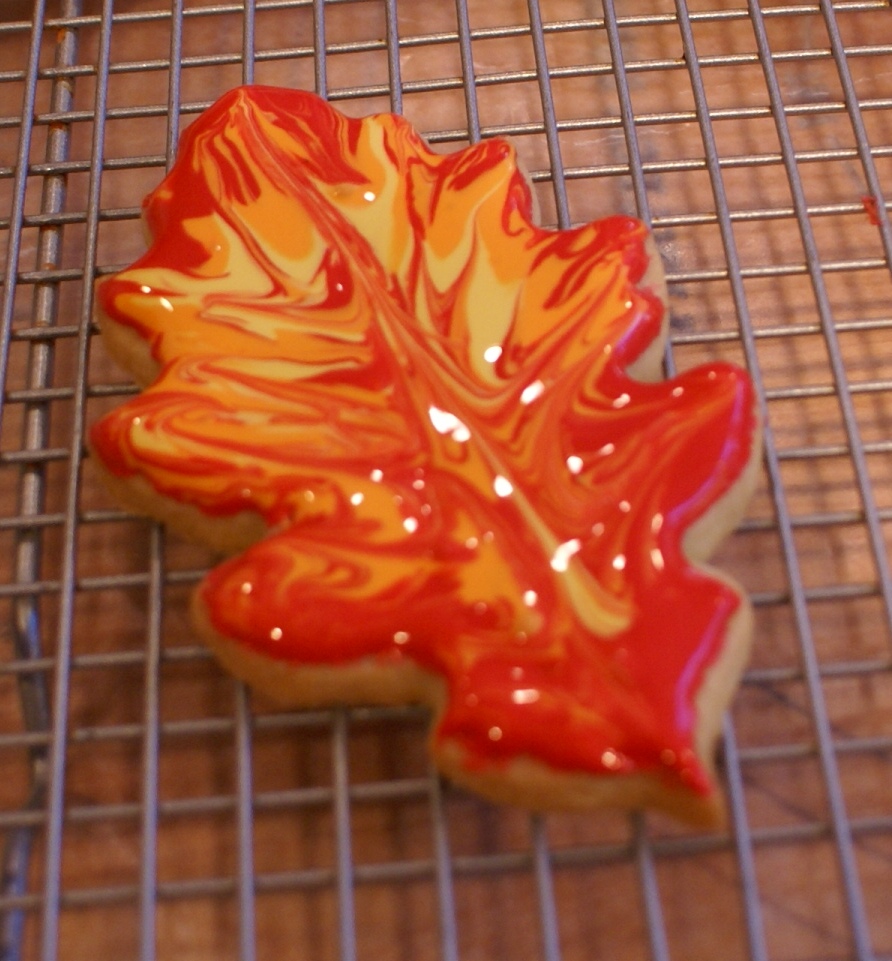
Stick with the brighter colors.
Buttercup yellow, rust, orange, burnt orange, red.
Browns and greens don’t work well when swirling colors together.
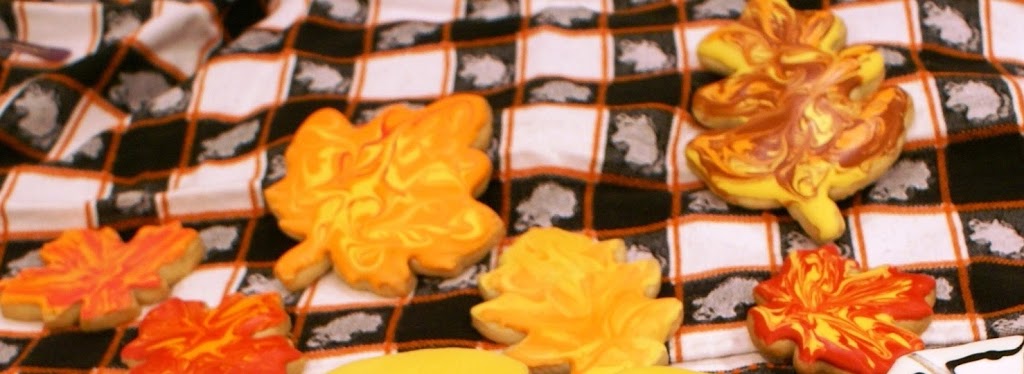
If you look at the photo of the finished large group of cookies you can see I tried using brown in a cookie on the upper right corner and it just didn’t fit it with the prettier colored ones.
These are my absolute favorite!
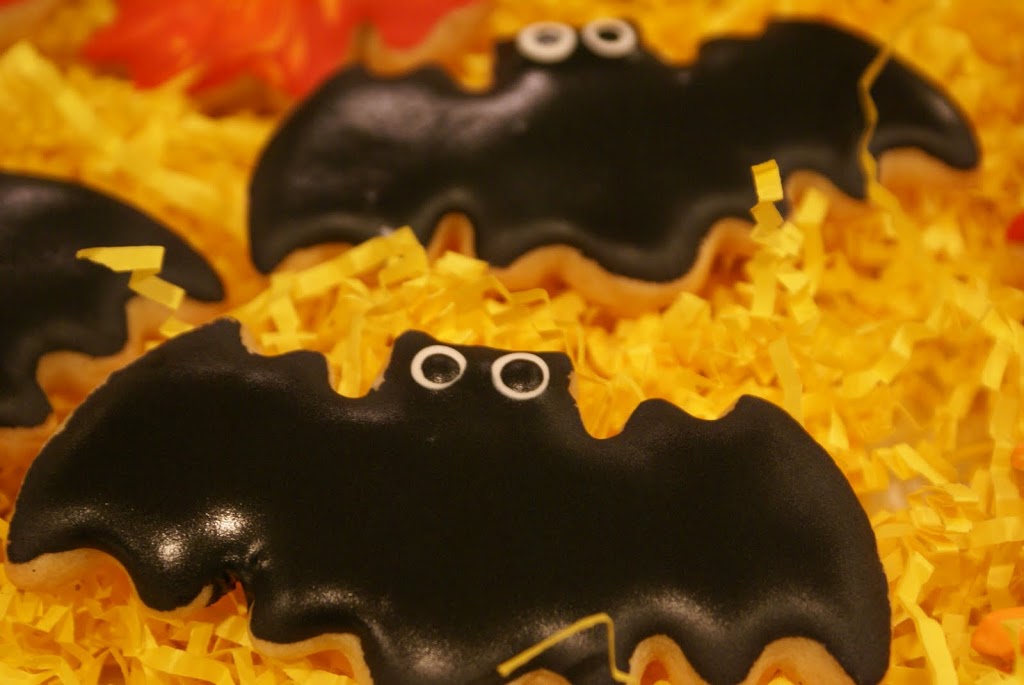
I have made trays and baskets of just bats for parties and friends and they all…well… just go batty over them!! Each one has their own personality with their little googly eyes. The icing for the eyes is also thinned.
Wait til the base of the bat has set a bit. Pipe two small white dots. They will bubble up. You can do a whole cookie sheet of bat white dots and come back and add the black dots on top of the white and the black will still melt into the white. Don’t add the white before the base sets up or you will have flat eyes. Because I was rushing here and could not wait, mine came out flat. Raise ones are much cuter.
Also, to save time when I know I’m going to be making lots of bats in the future, I make extra eyes on waxed paper, wait until they are thoroughly dried and peel them off and store them to drop on to the ‘wet’ bats during another baking time. The dried royal icing eyes release easier from waxed paper compared to parchment so I recommend using waxed paper.
* Sometimes I am very lazy and do not want to use a bag for such a small amount of icing for the dots so I will use a #3 round tip like a thimble and push the icing through with my finger that i wrapped with a small piece of plastic wrap.
I am always looking for the easiest way when I am decorating.
If I do use a bag with a tip I insert a toothpick in the end of the tip to keep it from running and drying out and stand it up in a drinking glass that is tall.
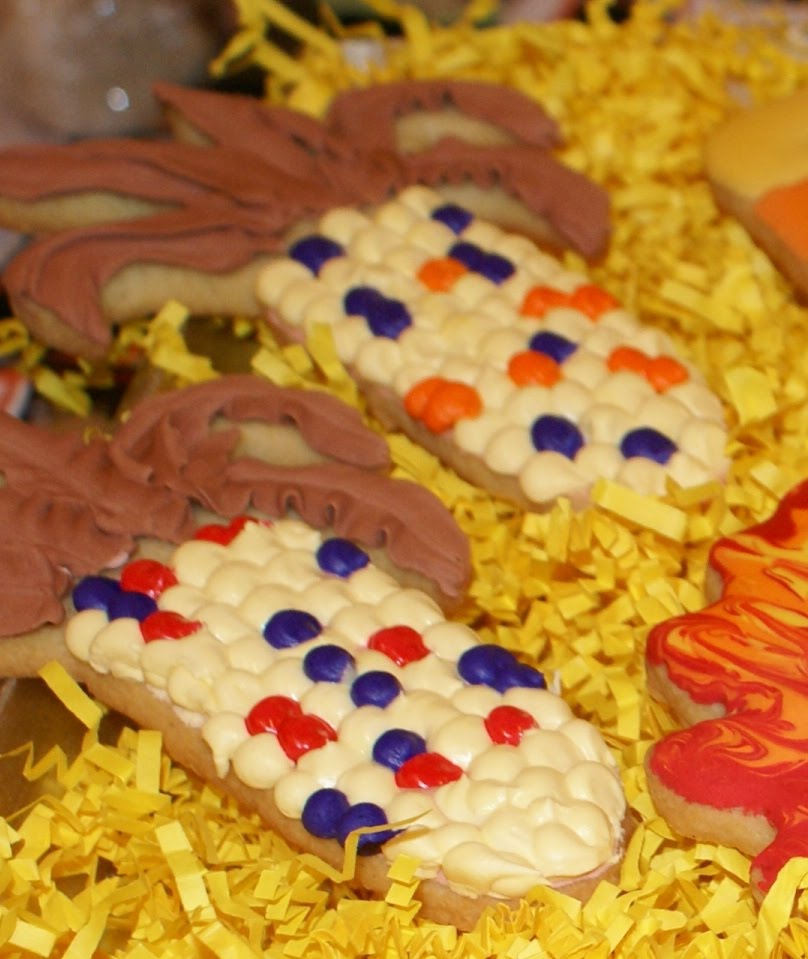
I drew this Indian Corn template and every year I try different colors and tips. This year I used a regular leaf tip for the husks and a #5 or #6 round to make the kernels and randomly added accent colors of purple/orange and purple/red.
I like the purple and orange combo the best.
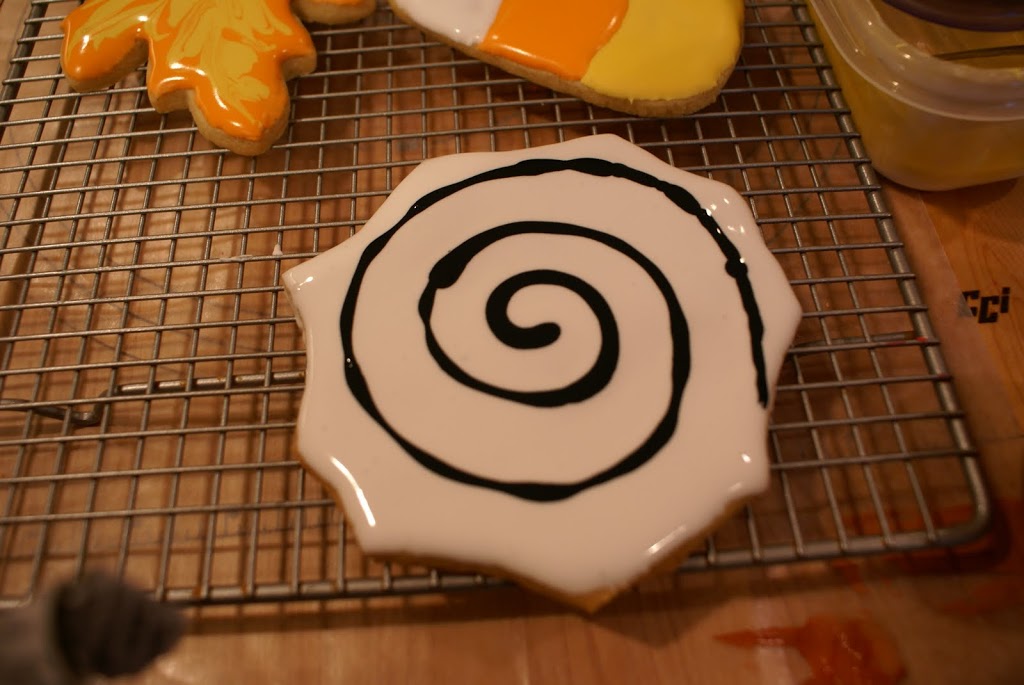
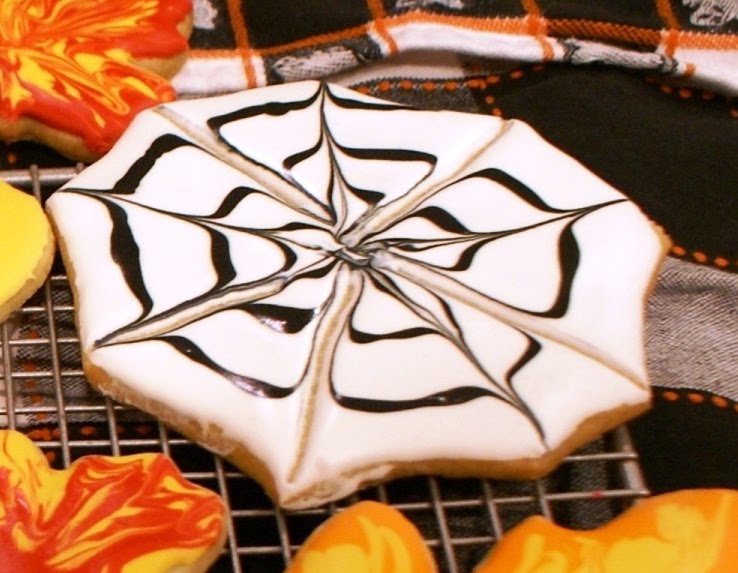
My original pattern is from Martha many, many years ago. After making a spiral in thinned black, pull in and out from the center to the outer points of the web and back again from the point to the center. Alternate coming in and out. If I have left over regular black icing I will add a spider to the web but the web needs to be dry or the spider will melt into the web and look like a squished insect. Personally, this is how I prefer all bugs to be just not sweet ones on cookies. 🙂
See how I used the back of the brush to drag through the icing?

Tsk, tsk! “Baker’s Piece!!” 🙂
Pumpkin –
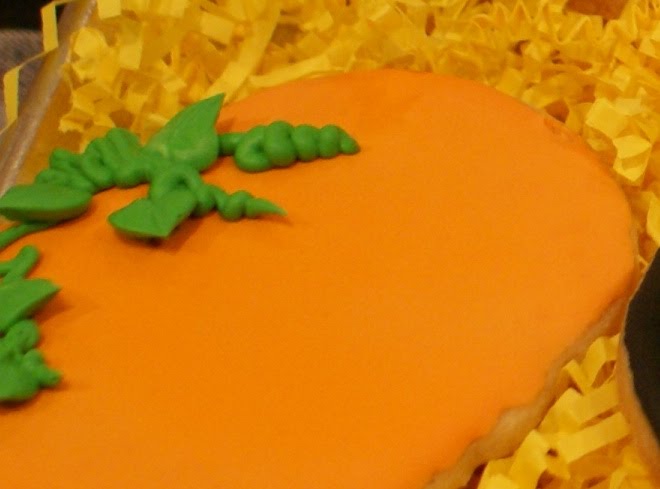
The vines are made with a #3 round tip and #352 for the small leaves. Sometimes I will drag the brush end in the pumpkin while it is setting to look like the ribs in a pumpkin. Give it a try.
It adds a little more dimension to it.
Whew! I hope you have enjoyed Parts I, II and III and that you will try making these for yourself. If you any questions, please leave a comment or send me an email.
I would to see your pics of what you have created too!
Also, a big thank you to many of you who left comments on my anniversary and honeymoon posts last week. It was very thoughtful of you and I appreciated your well wishes of congratulations. Thank you again for your kindnesses and sharing the memory with me!
Have a great weekend, BFs!
xoxo


Love the bats and candy corn!
Absolutely beautiful! But I’m still not doing it myself!
Oh my gosh, those are amazing! Very time consuming but worth it.
These cookies are so beautiful! Did you do all of these yourself? You should make one big printable instruction sheet so we can all print it out! I would love to have a step-by-step sheet for my “favorite cookbook”. I can’t wait to get baking.
Have a great weekend!
XOXO
Tres creative!!! Xoxo-BLC
You are so talented that I’m in total awe of you. Those cookies are worthy of the kind of Halloween parties that we go to. The sophisticated kind. Wow. I’m just wondering why I can’t do that.
They are beautiful! xoxo
SC
So beautiful! Love the bats and leaves. I’m scared to attempt though. I wish I had the patience/time to try. I do make homemade cookies (and will definitely try your recipe) and will make buttercream frosting for them. I think the royal icing just scares me!
YOU are very talented. What amazing cookies! I could never make something so beautiful.
I’m sure glad my Hubby doesn’t read these blogs to see what other women (like you) are capable of doing. I’d have been “fired” long ago…
😉
this is going to be SO helpful! thank you!!
you should do a “repost” to help the less royal-icing inclined, like myself, navigate the christams cookie season 🙂
Wow.. you are AMAZING at this.
Thank you so much for your tutorials and sharing your knowledge and talent with us. Your cookies are beautiful!
I notice in your post you mention “egg whites” however, I don’t see that in your recipe – does the icing include egg whites?
Elyssa,
Meringue power is just dried egg whites with maybe a few stabilizing ingredients. When I referred to egg whites I was referring to meringue powder. Thank you for having me clarify this. 🙂